

How Can You Run WordPress on Azure?
Microsoft (News - Alert) Azure is Microsoft's public cloud computing platform. It provides cloud services such as computing, storage, networking, and analytics. Beyond these basic computing services, it provides a range of platform as a service (PaaS) solutions that allow users to develop applications and services using familiar technologies and frameworks.
Azure App Service is an HTTP-based service for hosting web applications, REST APIs, and mobile backends. It provides a range of application templates for popular content management systems (CMS) like WordPress, Joomla, and Drupal.
You can develop applications in popular languages including PHP, .NET (News - Alert), Java, Ruby, Node.js, and Python. Applications can easily run and scale in Windows-based and Linux-based environments.
App Service gives your application Microsoft Azure features such as security, load balancing, high availability, autoscaling, and auto-management. You can also leverage DevOps features such as continuous deployment, package management, staging environments, custom domains, and TLS/SSL certificates from Azure DevOps, GitHub, Docker Hub, and other sources.
Another important capability is the App Service Migration Assistant, which lets you quickly and automatically migrate web applications to Azure with little or no code changes. The Migration Assistant performs readiness checks and offers resolutions for common problems that might affect your cloud migration. As you plan migrating your WordPress instance to the cloud, refer to this cloud migration checklist.
What are the Costs of WordPress on Azure App Service?
When planning your Azure cost optimization strategy, an important factor is the cost of services like Azure App Service. Applications in Azure App Service always run in App Service plans. Azure Functions can also run in a plan. These plans define the compute resources for web applications to run, similar to a server farm in the standard web hosting model. You can configure multiple applications to run on the same plan and resources.
Each App Service plan in a given region sets the compute resources in the region. Any application on the plan will run on these resources. App Service plans define the region, operating system, number and size of VM instances, and pricing tier.
An App Service plan’s pricing tier determines the features and costs available. The options depend on the selected operating system. Pricing tiers fall into the following categories:
- Shared—includes the Shared and Free tiers, which allocate a CPU quota to each application running on shared VMs.
- Dedicated—includes the Basic, Standard, and Premium (including PremiumV2 and PremiumV3) tiers, which dedicate Azure VMs for apps on the same plan. Higher tiers provide more VM instances.
- Isolated—includes the Isolated and IsolatedV2 tiers, which provide dedicated VMs and virtual networks. It isolates the network and compute resources, supporting maximum scaling.
These tiers also provide different App Service features, including custom domains, TLS/SSL certificates, deployment slots, auto scaling, backups, and traffic manager integration. Higher tiers offer more features.
How to Create a WordPress Site with Azure App Service
The following step-by-step tutorial guides you through the process of using the Azure portal to create and deploy a WordPress site to Azure App Service on Linux.
Here are several things to consider before following this guide:
- Note that this tutorial uses the Basic tier, incurring costs for your Azure subscription.
- The WordPress installation includes pre-installed plugins for improved performance, Smush for image compression, and W3TC for caching.
Here is how to use the Azure portal to create a WordPress site:
1. Go to the Azure portal at https://portal.azure.com and sign in to your account.
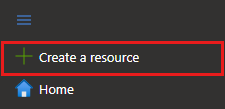
2. In the portal, find and choose the Create a resource option.

3. In the Create a resource page, go to the search bar, type WordPress, and press enter.
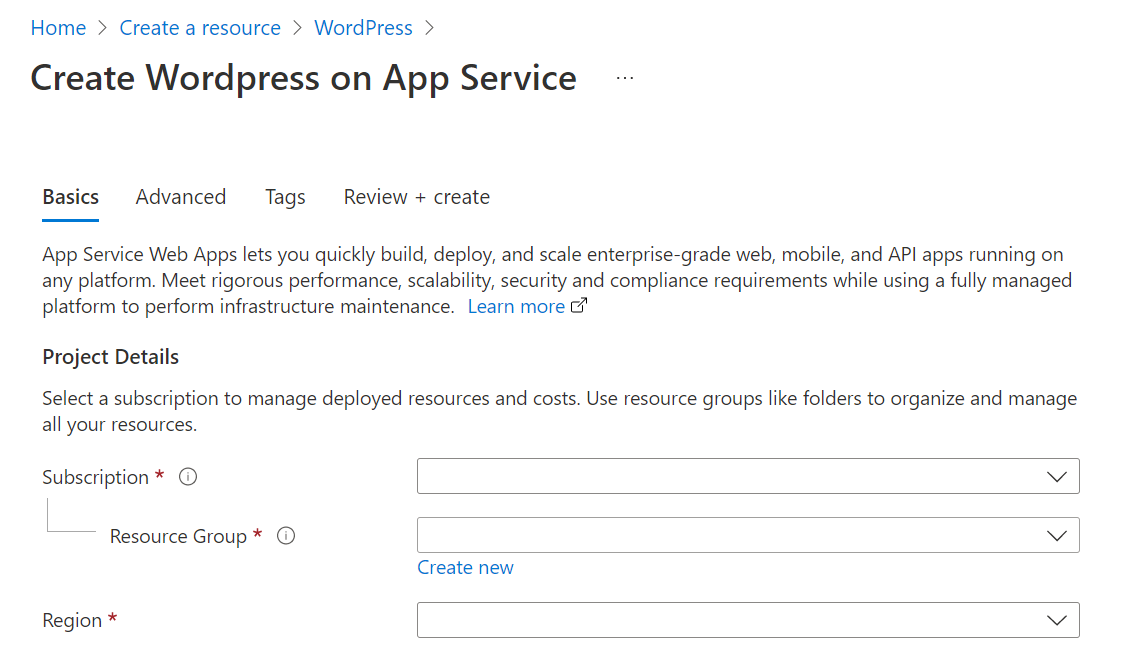
4. Choose the WordPress product for App Service.
5. Go to the Basics tab, find the Project details, verify the correct subscription is selected, and choose the Create new resource group option. In the Name bar, Type myResourceGroup and choose a Region for your app.

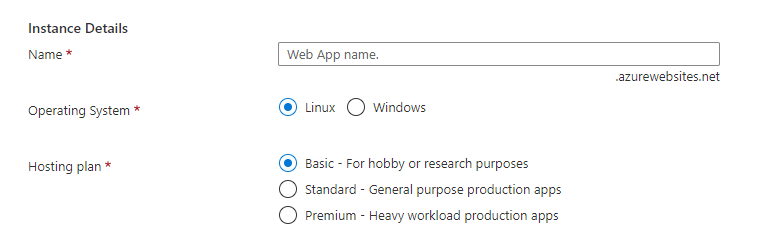
6. Go to Instance details, enter a unique name for your app, choose Linux as the Operating System, and choose Basic as your Hosting plan.

7. Go to WordPress Settings, and enter an Admin Username, Admin Email, and Admin Password. Note this Admin Email is used only for WordPress administrative sign-in.
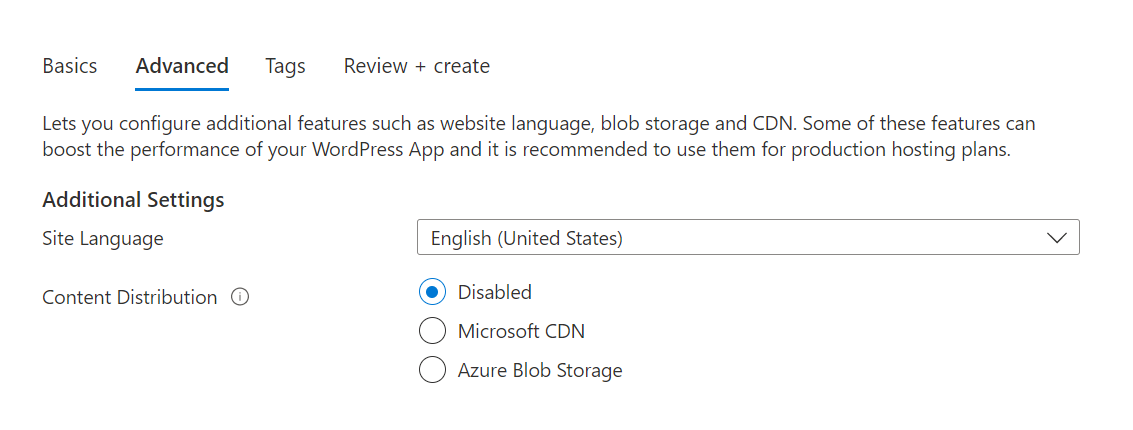
8. Choose the Advanced tab. Find the Additional Settings option, and choose the desired Site Language and Content Distribution. If you are not familiar with Blob Storage or content delivery networks (CDN), choose Disabled.

9. Choose the Review + create tab. Once validation finishes running, choose the Create option at the bottom of the page to start creating your WordPress site.
10. Go to the browser and enter your site URL to verify the app runs properly. It might take a few minutes for the site to load. Allow a few more minutes if you receive an error, and then refresh your browser.
11. You can access the WordPress Admin page by browsing to /wp-admin, using the credentials you have created in the beginning.
Best Practices for Wordpress on Azure
Compress Images
Most websites utilize many images and media files to showcase products, services, and various visualized messages. These images are critical to ensuring a positive experience, but they can also destroy the experience. Heavy image files can take up most of the site’s bandwidth, causing loading and performance issues.
You can mitigate this issue by storing all media content in an Azure Storage Blob. It involves using an Azure Storage Plugin, which enables your site to store new content to Azure storage instead of directly uploading it to your WordPress site. You can also use an Azure CDN with Azure Storage to reduce bandwidth for sites with heavy media content.
Optimize Your Database
WordPress automatically saves your site to ensure your information is backed up. However, this feature can quickly fill your database with many post revisions, pingbacks, trackbacks, trash items, and comments. You can clean up this data, but you must do so manually and regularly to ensure your storage is not clogged with unnecessary data.
Typically, your website database has a limited storage capacity. If you do not clean it regularly, you might hit this limit. You can mitigate this issue using WP-Optimize, a plugin that can help easily optimize your WordPress database with minimal manual work. It caches your data, makes your database more efficient, and ensures it stores only the data you need.
Choose the Right MySQL Database Solution for Your WordPress Needs
WordPress uses MySQL, a popular open source relational database management system (RDBMS) that stores databases in an organized manner. Here are the two main MySQL database solutions you can choose from, each offering unique features:
- Azure Database for MySQL—when hosting WordPress on Azure, the default database solution option is Azure MySQL, a managed cloud-based service for deploying MySQL on Azure. The service supports several SKU options to ensure you can meet a range of performance, pricing, and scalability requirements.
- MySQL in-app—this option is for Windows only. It provides a MySQL instance that runs on the same instance with your web app and shares resources from the same App Service plan. Web apps that use MySQL in-app are unsuitable for production purposes and cannot scale beyond one instance.
Ideally, you should investigate the various offerings and test to determine which provides your website with the best performance.
Diagnose If Any Plugin Is Slowing Down Your Site
WordPress sites rely on plugins to extend their basic functionality. However, some plugins can significantly slow down the site, especially poorly configured or written plugins. You can mitigate this issue by using P3, a plugin that can help you determine how much all the plugins on your site impact page load times.
The information provided by P3 can help you learn whether some plugins are unused and understand which actions to take to speed up your site. Use this information to clean up and remove all unused plugins and ensure your site utilizes only plugins that do not hinder its performance.
Conclusion
In this article, I introduced the basics of WordPress on Azure App Engine, showed how to set up your first WordPress website in Azure, and provided best practices to make more effective use of the Azure cloud:
- Compress images and store them in Azure Storage blobs
- Optimize your database using a plugin like WP-Optimize
- Choose the best MySQL database option (Azure Database for MySQL or MySQL in-app)
- Diagnose plugins that might be slowing down WordPress performance
I hope this will be useful as you consider migrating your WordPress instance to the Azure cloud.